本篇文章对应的教学视频链接:WPF中如何实现符合MVVM模式的文件拖入功能
原始方式
在 WPF 中,实现文件拖入功能并不难。稍微在网上搜索一下,就能够得到答案。比如现在有一个窗口,我们只需要设置它的 AllowDrop 属性为 True,然后在 Drop 事件中处理即可。形如:
1
2
3
| <Window ...
AllowDrop="True"
Drop="Window_Drop">
|
 1
 2
 3
 4
 5
 6
 7
 8
 9
10
11
12
13
14
15
16
| public partial class MainWindow : Window
{
public MainWindow()
{
InitializeComponent();
}
private void Window_Drop(object sender, DragEventArgs e)
{
if (e.Data.GetDataPresent(DataFormats.FileDrop))
{
var files = (string[])e.Data.GetData(DataFormats.FileDrop);
// 处理拖入的文件
}
}
}
|
添加视图模型
但问题是,如果现在 Window 拥有一个视图模型(ViewModel),形如:
 1
 2
 3
 4
 5
 6
 7
 8
 9
10
11
12
13
| public class MainViewModel : ViewModelBase
{
private string? _fileName;
public string? FileName
{
get => _fileName;
set
{
_fileName = value;
OnPropertyChanged(this, nameof(FileName));
}
}
}
|
Info
这里我们假定已经实现了 ViewModelBase 类,它实现了 INotifyPropertyChanged 接口,并提供了 OnPropertyChanged 方法以便于通知属性发生了变化。
然后 Window 上面有一个 TextBox 绑定了这个属性,这又该怎么办呢?
这里有两种比较简单粗暴的方式:
- 为
TextBox 添加一个 Name,然后在 Window 的 Drop 事件中直接修改 TextBox 的 Text 属性,进而使用依赖属性的一些方法来通知绑定的 ViewModel 属性发生了变化 - 在
Window 的 Drop 事件中直接修改 ViewModel 的属性(获取 Window.DataContext,并将其转为 MainViewModel 类型),然后在 ViewModel 中实现 INotifyPropertyChanged 接口,进而通知 TextBox 的 Text 属性发生了变化
这两种方式都很直接,而且其实都不违背 MVVM 模式。但是这两种方式并不优雅,所以这里我们借助行为(Behaviors)来实现一个更加优雅且通用的方式。
使用行为
首先,我们需要安装 Microsoft.Xaml.Behaviors.Wpf 包。然后我们可以创建一个 DropFileBehavior 类,形如:
 1
 2
 3
 4
 5
 6
 7
 8
 9
10
11
12
13
14
15
16
17
18
19
20
21
22
23
24
25
26
27
28
29
30
31
32
33
34
| public class DropFileBehavior : Behavior<FrameworkElement>
{
public string[]? Data
{
get => (string[]?)GetValue(FilesProperty);
set => SetValue(FilesProperty, value);
}
public static readonly DependencyProperty FilesProperty = DependencyProperty.Register(
nameof(Data),
typeof(string[]),
typeof(DropFileBehavior),
new UIPropertyMetadata(null)
);
protected override void OnAttached()
{
AssociatedObject.AllowDrop = true;
AssociatedObject.Drop += DropHandler;
}
protected override void OnDetaching()
{
AssociatedObject.Drop -= DropHandler;
}
private void DropHandler(object sender, DragEventArgs e)
{
if (e.Data.GetDataPresent(DataFormats.FileDrop))
{
Data = (string[])e.Data.GetData(DataFormats.FileDrop);
}
}
}
|
这个行为大致实现的功能是:
- 当附加到一个
FrameworkElement 上时,将其 AllowDrop 属性设置为 True,并注册 Drop 事件 - 当拖入文件时,将文件路径保存到
Data 依赖属性中
然后我们就可以在 XAML 中使用这个行为了(因为这里我们声明的 Data 属性是一个数组,所以我们稍微修改 MainViewModel 中相关属性的名称及类型,从而实现绑定功能):
 1
 2
 3
 4
 5
 6
 7
 8
 9
10
| <Window ...
xmlns:i="http://schemas.microsoft.com/xaml/behaviors"
xmlns:local="clr-namespace:YourNamespace">
<i:Interaction.Behaviors>
<local:DropFileBehavior Data="{Binding FileNames, Mode=OneWayToSource}" />
</i:Interaction.Behaviors>
<TextBox Text="{Binding FileNames[0]}" />
</Window>
|
注意这里,我们在书写行为的 Data 属性的绑定时,使用了 Mode=OneWayToSource,这是因为我们只需要将数据从视图传递到视图模型,而不需要反向传递。并且如果不写 Mode,它默认将会是 OneWay,导致可能无法正确通知到 ViewModel。
制作界面
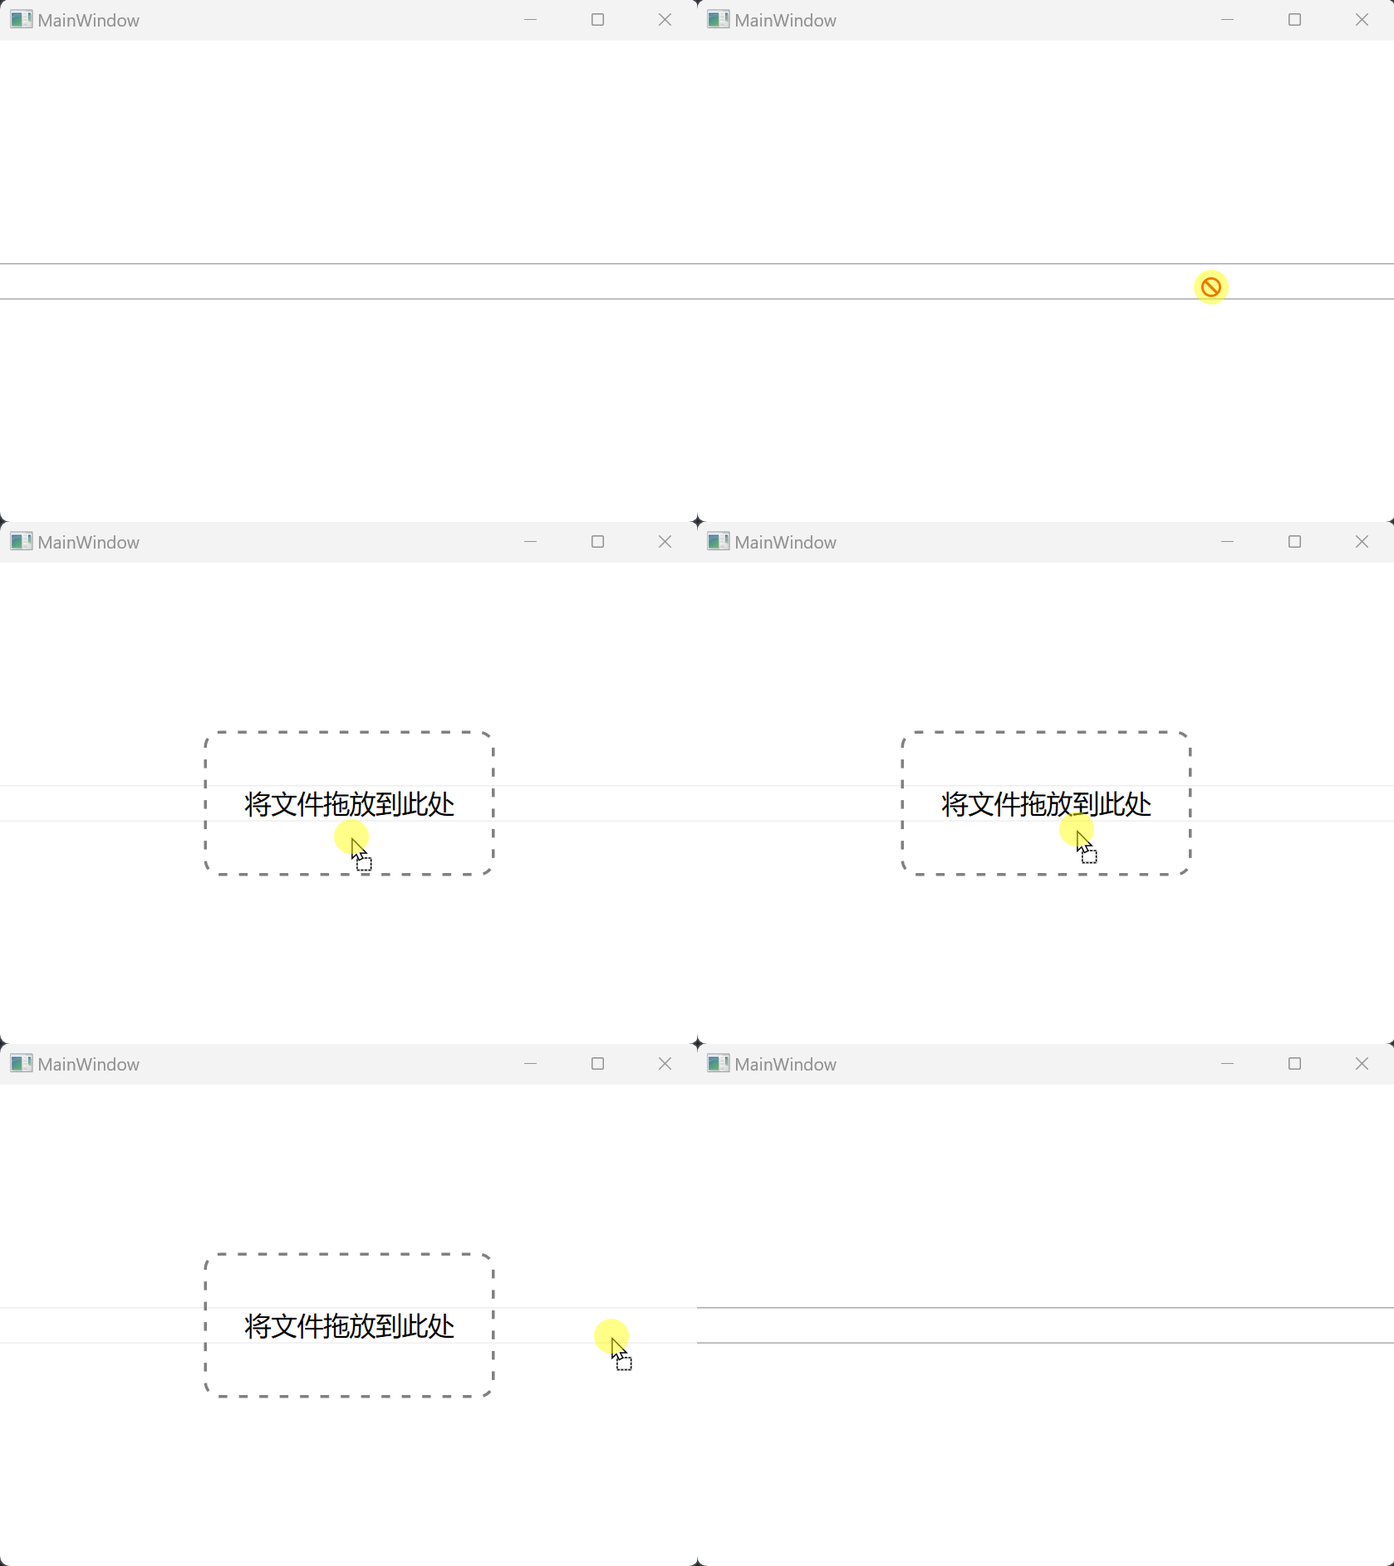
最后,我们还可以搞一个“酷炫”的界面,形如:

首先,我们可以在窗口中添加这样一个置于上方的控件:
 1
 2
 3
 4
 5
 6
 7
 8
 9
10
11
12
13
| <Grid Name="dropFilePanel" Visibility="Hidden">
<Border Background="White" Opacity="0.8" />
<TextBlock HorizontalAlignment="Center"
VerticalAlignment="Center"
Text="将文件拖放到此处" />
<Rectangle Width="200"
Height="100"
Stroke="Gray"
RadiusX="10"
RadiusY="10"
StrokeDashArray="3,4"
StrokeThickness="2" />
</Grid>
|
同时,因为我们现在有了这个专门的用于放置文件的面板,所以我们可以将之前添加给窗口的行为转移到它身上,形如:
1
2
3
4
5
| <Grid Name="dropFilePanel" Visibility="Hidden">
<i:Interaction.Behaviors>
<local:DropFileBehavior Data="{Binding FileNames, Mode=OneWayToSource}" />
</i:Interaction.Behaviors>
...
|
但是我们要控制它在合适的时机出现与消失。这里我们可以使用触发器与行为来快速地实现这一效果。具体来说,我们可以给窗口添加这样的触发器:
 1
 2
 3
 4
 5
 6
 7
 8
 9
10
11
| <Window ...
xmlns:b="http://schemas.microsoft.com/xaml/behaviors">
<b:Interaction.Triggers>
<b:EventTrigger EventName="DragEnter">
<b:ChangePropertyAction TargetObject="{Binding ElementName=dropFilePanel}" PropertyName="Visibility" Value="Visible" />
</b:EventTrigger>
<b:EventTrigger EventName="DragLeave">
<b:ChangePropertyAction TargetObject="{Binding ElementName=dropFilePanel}" PropertyName="Visibility" Value="Hidden" />
</b:EventTrigger>
</b:Interaction.Triggers>
...
|
这样,当鼠标拖入窗口时,dropFilePanel 就会显示出来;当鼠标拖出窗口时,dropFilePanel 就会被隐藏。
实际测试后会发现,当我们将文件拖到上方并松开左键后,虽然行为得到了正确的响应,但面板并没有消失。这是因为我们上面写的触发器只会在鼠标拖动状态离开窗口后才会隐藏面板。所以这里,我们可以再为面板添加一个触发器,并在它触发了 Drop 事件后将自身隐藏:
1
2
3
4
5
6
| <Grid Name="dropFilePanel" Visibility="Hidden">
<b:Interaction.Triggers>
<b:EventTrigger EventName="Drop">
<b:ChangePropertyAction PropertyName="Visibility" Value="Hidden" />
</b:EventTrigger>
</b:Interaction.Triggers>
|
这样,上面动图中的效果就实现了。
总结
WPF 开发必然会经常和控件的事件打交道。但很多时候,如果我们希望遵循 MVVM 模式,可能就会不知所措。相信大家通过这篇文章的代码,都能够充分领略到使用触发器与行为的强大之处。当然,这里只是一个简单的例子,实际开发中,我们还可以为上面的例子添加更多丰富的功能及特效。这些就有待大家的探索了。
大家如果有什么自己的好方法,也欢迎在文章评论区留言,分享给大家。

